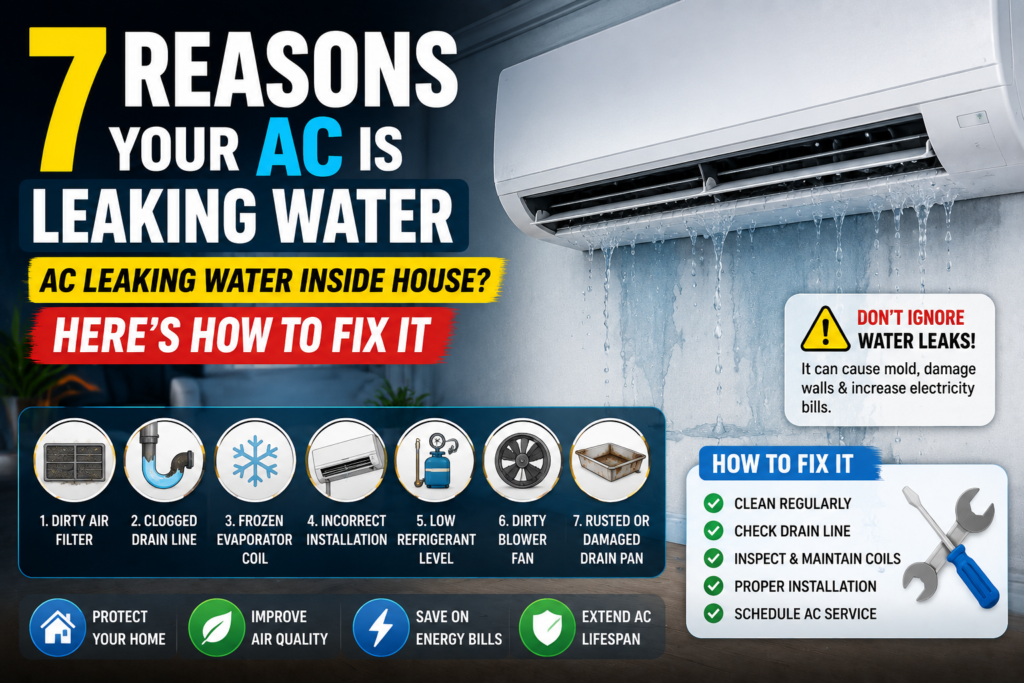
If you are dealing with an AC leaking water inside house, the most common culprit is a blocked condensate drain line or a frozen evaporator coil. When dust and algae build up in the drainage system, water backs up and overflows the internal pan, leading to potential ceiling damage and mold growth.
Few things trigger a homeowner’s panic quite like the sight of a puddle forming beneath their indoor AC unit. Is it a minor glitch or a total system failure?
In 2026, air conditioning systems have become more efficient, but the physics of cooling remains the same: your AC is essentially a giant dehumidifier. When that process goes sideways, gravity takes over, and water ends up on your floor instead of outside.
Before you call a technician for a $200 service visit, let’s walk through the primary causes of an AC water leak and how you can troubleshoot the issue yourself.
How Does an AC Unit Produce Water?
To fix the leak, you have to understand where the water comes from. Your indoor unit contains an evaporator coil. As warm air from your home passes over this cold coil, moisture in the air condenses into water droplets—just like a cold soda can on a humid day.
Under normal conditions:
- Water drips into a drain pan.
- It flows out through a condensate drain line.
- It exits your home safely.
When any part of this “highway” is blocked, the water has nowhere to go but out of the unit and onto your drywall or flooring.
Why This Happens (And Why You Shouldn’t Ignore It)
Finding a puddle of water beneath your indoor AC unit is one of the most common — and most misunderstood — air conditioner problems. The good news is that in most cases, the cause is simple and the fix is something you can handle yourself without calling a technician. Left unattended, however, a leaking AC can damage walls, ceiling boards, flooring, and even encourage mould growth. So it’s worth addressing promptly.
This guide walks you through every likely cause and exactly what to do about it.
How Your AC Produces Water in the First Place
Your air conditioner doesn’t just cool air — it also dehumidifies it. As warm, humid air passes over the cold evaporator coil inside your indoor unit, moisture condenses on the coil’s surface, much like how a cold glass sweats on a humid day. This condensed water drips into a drain pan and flows out through a drain pipe (also called the condensate drain line) to the outside.
When any part of this process breaks down, water has nowhere to go — and it ends up on your floor or dripping from the unit.
Also Check out How Much Electricity Does a Split AC Consume? (Complete Guide for Indian Users)
Common Causes of AC Water Leaks and Their Fixes
1. Clogged Condensate Drain Line
This is the number one cause of AC water leaks. Over time, dust, dirt, algae, and mould can build up inside the drain pipe and block the flow of water. When the pipe is blocked, water backs up into the drain pan, overflows, and leaks into your home.
How to fix it: Locate the drain pipe — it’s usually a white PVC pipe exiting the indoor unit or wall. Use a wet-dry vacuum to suction out the blockage from the outdoor end of the pipe. Alternatively, pour a cup of diluted white vinegar into the drain access point (near the indoor unit) to break down algae and buildup. Repeat this once every one to two months as preventive maintenance.
2. Dirty or Frozen Evaporator Coils
When the evaporator coil gets coated in dust and grime, airflow across it is reduced. This causes the coil to get excessively cold and freeze over. When the AC is turned off or when the ice eventually melts, a large amount of water drips out all at once — far more than the drain pan can handle.
How to fix it: Turn off your AC immediately. Let the unit run on fan-only mode for an hour or two to melt any ice. Then clean or replace the air filter — a dirty filter is almost always the root cause of restricted airflow. If the coils themselves are visibly dirty, they need professional cleaning with a coil cleaner spray.
3. Dirty or Clogged Air Filter
A clogged air filter is one of the most overlooked causes of AC problems in general, including water leaks. When the filter is blocked, the airflow across the evaporator coil drops sharply, causing it to freeze as described above.
How to fix it: Check your air filter. If it’s grey, matted with dust, or it’s been more than 30–45 days since you last cleaned or replaced it, that’s your culprit. Clean washable filters with water and mild detergent, let them dry fully, and reinstall. Replace disposable filters entirely.
4. Cracked or Overflowing Drain Pan
The drain pan sits beneath the evaporator coil and collects condensation. Over years of use, plastic drain pans can crack, warp, or corrode, causing water to drip straight through rather than into the drain pipe.
How to fix it: Inspect the drain pan with a flashlight. Look for visible cracks, rust, or signs of overflow. A cracked pan can be temporarily sealed with waterproof epoxy, but replacement is the proper long-term fix. Drain pans are inexpensive and can be sourced from AC spare parts dealers or ordered online.
5. Low Refrigerant Levels
If your AC is low on refrigerant (due to a leak in the system), the pressure inside the unit drops, causing the evaporator coil to freeze. As with a dirty coil, when this ice melts, it overwhelms the drain pan.
Signs that refrigerant may be the issue: the AC is blowing warm or weakly cooled air, you hear a hissing or bubbling sound, or the system takes a very long time to cool a room.
How to fix it: This is not a DIY job. Refrigerant handling requires a licensed technician. Call your AC service provider and mention that you suspect a refrigerant leak — they’ll pressure-test the system and refill it if needed.
6. Incorrect Installation or Unit Tilt
If your AC unit was installed with a slight forward tilt — meaning the indoor unit slopes toward the room rather than toward the drain outlet — water will pool on the wrong side and drip out the front.
How to fix it: Check whether your indoor unit is level or tilted slightly backward (toward the wall). The back of the unit should sit marginally lower than the front so that condensation flows naturally toward the drain. If the tilt is wrong, the mounting brackets need to be adjusted — a fairly simple job for any installation technician.
Also Read BEST 1.5 ton 3 Star Split AC in India
Summary: DIY Troubleshooting Checklist
| Symptom | Likely Culprit | DIY Difficulty |
| Water backing up in the pan | Clogged Drain Line | Easy (Vacuum/Vinegar) |
| Standing water with ice on coils | Dirty Air Filter | Very Easy (Replace Filter) |
| Water leaking only when unit is off | Melting Ice (Frozen Coil) | Easy (Thaw system) |
| Visible holes in the metal tray | Rusted Drain Pan | Medium (Epoxy or Replace) |
| Pump reservoir is overflowing | Broken Condensate Pump | Medium (Check power/Replace) |
Step-by-Step: What to Do Right Now
If your AC is actively leaking, here’s a quick action sequence before you diagnose the root cause:
- Turn off your AC at the thermostat or remote.
- Place towels or a shallow container under the leak to protect your floor or ceiling.
- Check and clean the air filter.
- Inspect the drain pan for overflow or cracks.
- Try clearing the drain line with a wet-dry vacuum or vinegar flush.
- Turn the AC back on after 30 minutes and monitor.
- If the leak continues or you suspect frozen coils or a refrigerant issue, call a technician.
Preventing Future Water Damage
- Change your filters every 30-90 days: This is the cheapest insurance policy against a flooded home.
- Install a “Float Switch”: This is a small device that fits onto your drain line. If the water backs up, the switch automatically shuts off your AC, preventing a massive leak before it starts.
- Annual Maintenance: Have a technician check the drain lines and refrigerant levels once a year before the summer heat hits.
Also Read Best 1.5 Ton Split AC In India
When to Call a Professional
Most water leaks can be resolved at home. However, call a certified AC technician if:
- The leak returns within a day or two of your DIY fix
- You notice ice on any part of the unit
- The AC is blowing warm air alongside the leak
- You hear hissing, gurgling, or bubbling sounds from the unit
- The drain pan is cracked and needs replacement
- The unit is under warranty and you don’t want to void it
How to Prevent AC Water Leaks in the Future
Prevention is significantly cheaper than repair. These habits will keep water leaks from becoming a recurring problem:
- Clean or replace your air filter every 30–45 days during heavy use seasons.
- Flush the condensate drain line with diluted vinegar every two months.
- Schedule a professional AC service at least once a year, ideally before summer begins.
- Keep the area around your indoor unit clear of dust and obstructions.
- Periodically check that the unit is still level and hasn’t shifted on its mounts.
Final Thoughts: AC leaking water inside house
An AC leaking water is almost always a solvable problem — and in most cases, a clean filter and a clear drain line is all it takes. The key is not to ignore it. What starts as a slow drip can quickly turn into water damage, mould, or a breakdown of the unit itself. Take fifteen minutes to run through the checks above, and you’ll likely resolve it before it becomes a bigger (and more expensive) issue.
Frequently Asked Questions (FAQ)
Is it safe to run my AC if it’s leaking water?
No. Aside from the risk of water damage to your home, a leak can lead to electrical shorts or mold growth inside your walls. Turn the system off until the source of the leak is identified.
Can I use bleach to clean my AC drain line?
While bleach kills algae, it can be corrosive to metal components and may damage the PVC over time. Distilled white vinegar is a safer, more eco-friendly alternative for regular maintenance.
Why is my AC leaking water inside when it’s raining outside?
This is usually a sign of an improper installation or a roof leak near the unit’s vent, rather than a mechanical AC issue. Rain shouldn’t be able to enter your indoor unit through the drain line.
How much does it cost to fix an AC water leak?
A DIY fix like a filter change or vinegar flush costs less than $20. A professional unclogging usually ranges from $75 to $200, while a refrigerant leak repair can exceed $500 depending on the severity.